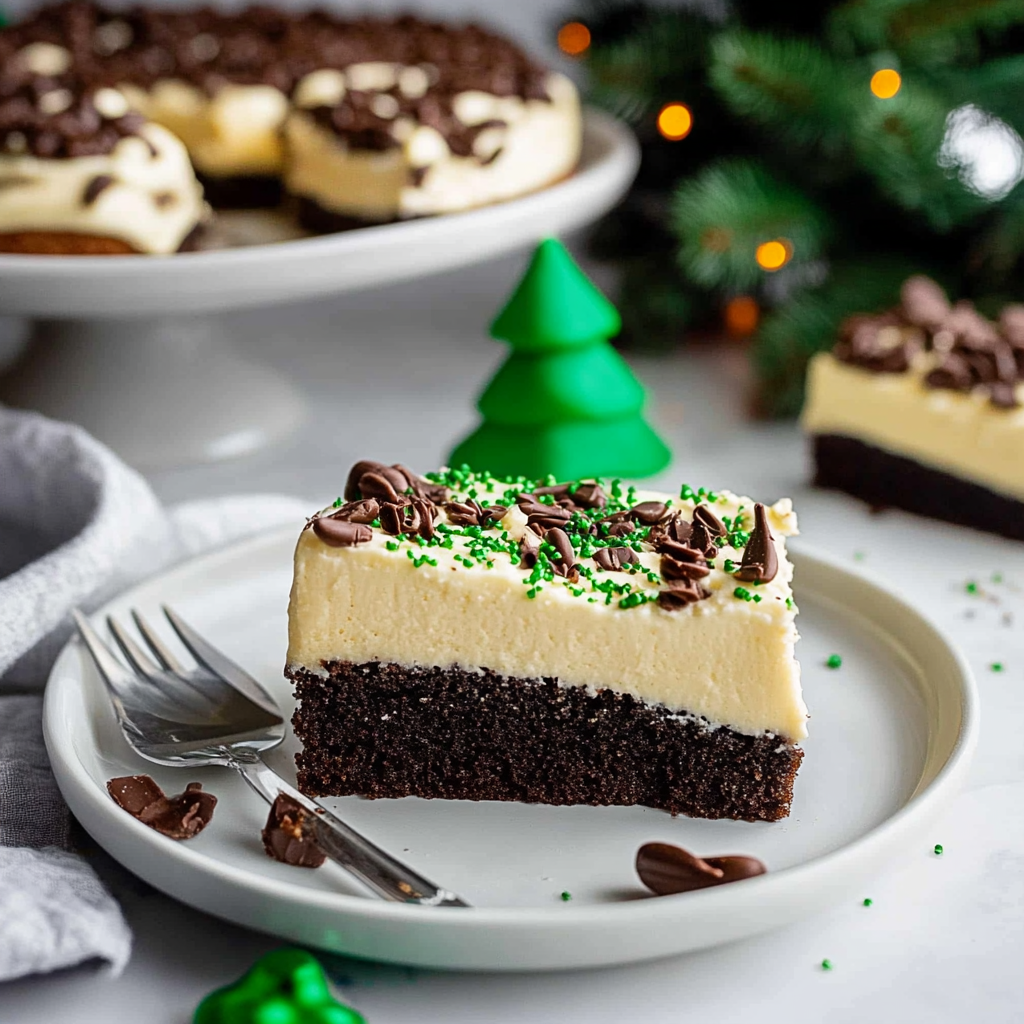
Christmas dirt cake is one of those delightful desserts that can make even the grouchiest Grinch crack a smile. Picture layers upon layers of creamy goodness, crumbled cookies, and the sweet smell of rich chocolate wafting through your kitchen. It’s a dessert that doesn’t just taste good; it also looks like a work of art—albeit an art piece that you can eat with a spoon.
Now imagine it at your holiday gatherings, stealing the spotlight from even the most extravagant yule logs and sugar cookies. Christmas dirt cake brings nostalgia, laughter, and a certain “wow” factor to any festive table. So roll up your sleeves and get ready to uncover the secrets to this easy yet impressive holiday treat.
Why You'll Love This Recipe
- This Christmas dirt cake is incredibly simple to prepare, making it perfect for busy holiday schedules.
- Its rich chocolate flavor paired with creamy textures will have everyone begging for seconds.
- Visually, it’s a fun showstopper that delights both kids and adults alike.
- Not only is it great for Christmas parties, but you can easily adapt it for birthday celebrations or family gatherings throughout the year.
Ingredients for Christmas dirt cake
Here’s what you’ll need to make this delicious dish:
- Chocolate Pudding Mix: Use instant mix for quick preparation; it creates a smooth and creamy layer.
- Cream Cheese: Softened cream cheese adds richness and helps bind the layers together.
- Cool Whip: This light topping balances out the dense pudding and cream cheese mixture perfectly.
- Chocolate Sandwich Cookies: Crushed cookies serve as both a crunchy layer and garnish; Oreos are a classic choice.
- Milk: Use whole milk for creaminess in your pudding mix; skim milk won’t give you the same texture.
The full ingredients list, including measurements, is provided in the recipe card directly below.
How to Make Christmas dirt cake
Follow these simple steps to prepare this delicious dish:
Step 1: Prepare the Pudding
In a mixing bowl, combine the chocolate pudding mix and milk according to package instructions. Whisk until smooth—this shouldn’t take more than two minutes. Set aside while you prepare the other components.
Step 2: Mix Cream Cheese
In another bowl, beat the softened cream cheese until it’s fluffy. Add half of the Cool Whip into this mixture and stir gently until fully combined. You want it to be light and airy without any lumps.
Step 3: Combine Mixtures
Gently fold the chocolate pudding into the cream cheese mixture. Be careful not to deflate all that fluffiness you’ve just created! The result should be a beautifully swirled blend of creamy chocolate goodness.
Step 4: Crush Cookies
Grab those chocolate sandwich cookies and put them in a resealable plastic bag (a rolling pin works wonders here). Crush them into fine crumbs—think sandy beach vibes rather than boulders!
Step 5: Layer It Up
In a trifle dish or large bowl, start layering your creation: begin with half of the crushed cookie crumbs at the bottom, followed by half of your pudding mixture. Repeat this process until you’ve used all ingredients up, finishing with a layer of cookie crumbs on top.
Step 6: Chill
Cover your masterpiece with plastic wrap and chill in the refrigerator for at least two hours—this allows flavors to meld together beautifully. Trust me; patience pays off when it comes to desserts!
Transfer to plates and serve with extra Cool Whip on top if you’re feeling fancy—or just because more whipped cream is always a good idea!
And there you have it! Your Christmas dirt cake is ready to dazzle friends and family alike! Enjoy every chocolaty bite while basking in compliments about your culinary prowess—no need to spill the beans about how easy it was!
You Must Know
- This Christmas dirt cake offers more than just flavor; it brings a festive cheer to your holiday gatherings.
- With its layers of chocolatey goodness and creamy delight, it’s a crowd-pleaser that’s as fun to make as it is to eat.
- Perfect for holiday parties, it also serves as a delightful dessert for cozy family dinners.
Perfecting the Cooking Process
Begin by preparing the chocolate pudding mix while you crush the Oreos into fine crumbs. Next, whip the cream cheese and fold in the whipped topping. Layer the ingredients in a trifle dish, alternating between pudding mixture and crushed cookies for a beautiful presentation.
Add Your Touch
Feel free to swap out Oreos for any chocolate cookie you love! Add layers of peanut butter or even peppermint extract for a festive twist. Top with seasonal sprinkles or fresh berries to make it extra special—after all, it’s Christmas dirt cake, not everyday dirt!
Storing & Reheating
Store any leftovers in an airtight container in the fridge for up to three days. Avoid freezing, as the texture may change. Just grab a spoon and dig in straight from the fridge!
Chef's Helpful Tips
- To achieve perfectly layered Christmas dirt cake, allow each layer to chill slightly before adding the next one.
- This helps maintain distinct layers and prevents sogginess.
- Use high-quality cocoa powder for richer flavor.
- A little patience goes a long way in making this dessert beautiful!
I remember the first time I made this Christmas dirt cake; my family couldn’t stop laughing at how much they loved something so whimsically named! It quickly became our holiday tradition, and now I can’t imagine Christmas without it.
FAQs :
What is Christmas dirt cake?
Christmas dirt cake is a festive dessert that combines layers of chocolate pudding, cream cheese, and crushed cookies to create a deliciously rich and creamy treat. Often decorated with gummy worms or candy canes, this no-bake cake is perfect for holiday gatherings. Its unique appearance mimics dirt, making it fun for kids and adults alike. Easy to prepare, it requires minimal ingredients and no baking time, adding to its appeal as a holiday favorite.
How do I make the crust for Christmas dirt cake?
To make the crust for your Christmas dirt cake, start by crushing chocolate sandwich cookies into fine crumbs. Combine these crumbs with melted butter until the mixture resembles wet sand. Press the crumb mixture firmly into the bottom of your serving dish to form a solid base. This crust provides a rich chocolate flavor that complements the creamy layers above. Let it chill in the refrigerator while you prepare the filling to ensure it sets properly.
Can I customize my Christmas dirt cake?
Absolutely! You can customize your Christmas dirt cake in many ways to suit your taste or theme. For instance, swap out the chocolate pudding for vanilla or butterscotch pudding for a different flavor profile. Additionally, you can add fruit like strawberries or raspberries between layers for freshness. Consider using holiday-themed decorations such as edible glitter or festive sprinkles to enhance its visual appeal during celebrations.
How long does Christmas dirt cake last?
Christmas dirt cake typically lasts about 3-5 days when stored in an airtight container in the refrigerator. The flavors meld beautifully over time, making it even more delicious after a day or two. However, be cautious about letting it sit too long, as the crust may become soggy if kept too long after preparation. Always check for freshness before serving, especially if you’re storing leftovers from a holiday party.
Conclusion for Christmas dirt cake :
In summary, Christmas dirt cake is an easy and delightful dessert that adds whimsy to any holiday gathering. With its layers of chocolate pudding and cookie crust, it offers both flavor and fun. Customization options abound, allowing you to tailor it to your preferences. Remember that this treat is best enjoyed fresh but can last several days in the fridge. Prepare this festive dessert to impress your guests and create lasting memories this holiday season!
Christmas Dirt Cake
- Prep Time: 20 minutes
- Cook Time: None
- Total Time: 51 minute
- Yield: Approximately 10 servings 1x
- Category: Dessert
- Method: No-bake
- Cuisine: American
Description
Delight in layers of creamy chocolate pudding and crunchy cookies, making Christmas dirt cake a fun, festive dessert that will charm everyone at your holiday gatherings.
Ingredients
- 1 package (3.9 oz) instant chocolate pudding mix
- 2 cups whole milk
- 8 oz cream cheese, softened
- 1 cup Cool Whip
- 15 chocolate sandwich cookies (such as Oreos), crushed
- Additional Cool Whip (optional)
Instructions
- In a mixing bowl, whisk together the chocolate pudding mix and whole milk until smooth. Set aside for a few minutes.
- In another bowl, beat the softened cream cheese until fluffy. Fold in half of the Cool Whip until well combined.
- Gently fold the pudding mixture into the cream cheese mixture until swirled but not fully blended.
- Place chocolate sandwich cookies in a resealable plastic bag and crush them into fine crumbs using a rolling pin or similar tool.
- In a trifle dish or large bowl, layer half of the crushed cookie crumbs at the bottom.
- Top with half of the creamy filling mixture.
- Repeat layering with remaining cookie crumbs and creamy filling, finishing with a layer of crushed cookies on top.
- Cover with plastic wrap and refrigerate for at least 2 hours before serving to let flavors meld together.
- Serve chilled, topped with extra Cool Whip if desired.
Nutrition
- Serving Size: 1 slice (approximately 130g)
- Calories: 260
- Sugar: 24g
- Sodium: 190mg
- Fat: 14g
- Saturated Fat: 8g
- Unsaturated Fat: 4g
- Trans Fat: 0g
- Carbohydrates: 29g
- Fiber: 1g
- Protein: 4g
- Cholesterol: 30mg
Keywords: You can substitute any favorite chocolate cookie for added flavor. For a festive twist, consider adding peppermint extract or seasonal sprinkles between layers. Allow each layer to chill slightly before adding the next for distinct layers.


Leave a Comment