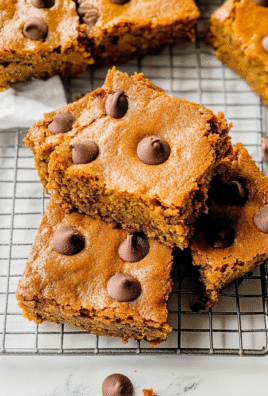
Buttercream Santa Cake is not just a dessert; it’s a holiday experience wrapped in layers of fluffy cake and creamy frosting. Imagine slicing into a soft, buttery cake adorned with a whimsical Santa face made from smooth buttercream, bringing festive cheer to any gathering. The aroma of vanilla and the sweetness of sugar waft through your kitchen, creating an atmosphere of joy.
Now, picture this: you’re at a holiday party, surrounded by laughter and the sound of jingle bells, and someone brings out this delightful Buttercream Santa Cake. Instantly, it becomes the star of the show. Everyone gathers around, phones out, capturing that Instagram-worthy moment. You know you need to recreate this magic in your own kitchen for the next family gathering or festive celebration.
Why You'll Love This Recipe
- This Buttercream Santa Cake is incredibly easy to prepare, requiring minimal baking skills while delivering maximum wow factor.
- The flavor profile combines rich vanilla with sweet buttercream that melts in your mouth.
- Visually appealing with its charming Santa design, it’s perfect for any holiday table.
- Plus, it’s versatile enough to customize for different occasions or tastes!
Ingredients for Buttercream Santa Cake
Here’s what you’ll need to make this delicious dish:
- All-Purpose Flour: The backbone of our cake! Use high-quality flour for the best texture.
- Sugar: Granulated sugar adds sweetness and helps create that tender crumb we love.
- Baking Powder: This leavening agent gives the cake its light and fluffy structure.
- Salt: Enhances all the flavors; don’t skip it!
- Unsalted Butter: Make sure it’s at room temperature for easy creaming with sugar.
- Eggs: They help bind all ingredients together; use large eggs for consistency.
- Vanilla Extract: Pure vanilla extract will elevate the flavor profile tremendously.
For the Buttercream Frosting:
- Powdered Sugar: This gives our frosting that sweet taste and smooth consistency.
- Unsalted Butter: Again, softened butter works best here; it helps create that dreamy texture.
- Heavy Cream: Adds richness and helps achieve the perfect spreading consistency.
- Food Coloring (Red & Black): To create Santa’s signature look—get ready to channel your inner artist!
The full ingredients list, including measurements, is provided in the recipe card directly below.

How to Make Buttercream Santa Cake
Follow these simple steps to prepare this delicious dish:
Step 1: Preheat Your Oven
Preheat your oven to 350°F (175°C). Prepare two round cake pans by greasing them lightly with butter or nonstick spray.
Step 2: Mix Dry Ingredients
In a bowl, whisk together all-purpose flour, sugar, baking powder, and salt until combined. Set aside while you get your wet ingredients ready.
Step 3: Cream Butter and Sugar
In a large mixing bowl, cream together unsalted butter and granulated sugar using an electric mixer on medium speed until light and fluffy—about three minutes should do the trick.
Step 4: Add Eggs and Vanilla
Add in eggs one at a time while continuing to mix. Once combined, pour in vanilla extract and mix until well incorporated.
Step 5: Combine Wet and Dry Ingredients
Gradually add the dry mixture to the wet mixture while alternating with milk (or heavy cream). Start and end with dry ingredients; mix until just combined—no one likes over-mixed cake!
Step 6: Bake & Cool
Pour batter evenly into prepared pans. Bake for about 25-30 minutes or until a toothpick inserted comes out clean. Let cool completely before frosting.
To finish off this delightful creation, generously frost each layer with buttery frosting using an offset spatula. For those artistic souls out there, use red food coloring for Santa’s hat and black for his belt!
Transfer slices onto plates and watch as everyone dives into this festive treat—because who can resist a smiling Santa?
You Must Know
- This delightful Buttercream Santa Cake is not just a feast for the eyes; it’s also a treat for the taste buds.
- The whimsical design and delicious flavor make it a showstopper at any holiday gathering.
- Plus, it’s surprisingly easy to whip up!
Perfecting the Cooking Process
Start by baking your cake layers first. Once they cool, create that magical buttercream while the layers chill in the fridge. Assemble and decorate once everything is ready to avoid any melty mishaps!
Add Your Touch
Feel free to customize your Buttercream Santa Cake! Swap out flavors with chocolate cake or add festive sprinkles. You could even use cream cheese frosting for a tangy twist.
Storing & Reheating
Store your Buttercream Santa Cake in an airtight container in the fridge for up to five days. If you need to reheat, slice a piece and microwave it for about 10 seconds to enjoy that fresh-baked taste!
Chef's Helpful Tips
- Use room temperature ingredients for your buttercream to achieve a smoother texture.
- Avoid over-mixing your cake batter to keep it light and fluffy.
- Lastly, let your cake layers cool completely before frosting to prevent melting.
Sometimes I catch my friends trying to sneak bites of this cake when they think I’m not looking—it’s that irresistible! Their laughter fills the kitchen as I pretend I don’t see them; it’s a holiday tradition in itself!
FAQs:
What ingredients do I need for Buttercream Santa Cake?
To make a delightful Buttercream Santa Cake, gather essential ingredients such as all-purpose flour, granulated sugar, baking powder, unsalted butter, eggs, milk, and vanilla extract. For the buttercream frosting, you will need unsalted butter, powdered sugar, heavy cream, and food coloring for decoration. These components blend together to create a rich and flavorful cake that captures the festive spirit of the holidays.
How do I decorate my Buttercream Santa Cake?
Decorating your Buttercream Santa Cake is a fun process! Start with a smooth layer of buttercream frosting on the cake. Use red and white frosting to create Santa’s hat and beard. A piping bag will help you achieve intricate details like eyes and a smile. Don’t forget to add some edible glitter or sprinkles for a festive touch. This decoration will make your cake not only delicious but also visually stunning!
Can I make Buttercream Santa Cake in advance?
Yes, you can make Buttercream Santa Cake in advance! You can bake the cake layers ahead of time and store them wrapped tightly in plastic wrap at room temperature for up to three days. The buttercream frosting can be prepared and refrigerated for up to two weeks. When ready to serve, simply assemble and decorate the cake. This strategy allows you to save time during busy holiday preparations while still impressing your guests.
What are some variations of Buttercream Santa Cake?
There are many delicious variations of Buttercream Santa Cake to explore! Consider adding flavors like chocolate or red velvet for a twist on the traditional vanilla cake. You can also incorporate different fillings such as fruit preserves or cream cheese for added richness. Experimenting with various colors and decorations can turn this festive dessert into something unique that suits your personal taste or holiday theme.
Conclusion for Buttercream Santa Cake:
In summary, the Buttercream Santa Cake is a delightful addition to any holiday celebration. With its simple yet rich ingredients and charming decorations, it captures the essence of Christmas cheer. Whether you choose to make it in advance or enjoy it fresh from the oven, this cake offers versatility in flavors and designs. So gather your supplies and let your creativity shine while making this festive treat that everyone will love!

Buttercream Santa Cake
- Prep Time: 20 minutes
- Cook Time: 30 minutes
- Total Time: 50 minutes
- Yield: Approximately 12 servings 1x
- Category: Dessert
- Method: Baking
- Cuisine: American
Description
Buttercream Santa Cake is a festive dessert that delights with its fluffy layers and creamy frosting, making it the perfect centerpiece for holiday celebrations.
Ingredients
- 2 cups all-purpose flour
- 1 ½ cups granulated sugar
- 1 tbsp baking powder
- ½ tsp salt
- ½ cup unsalted butter, softened
- 4 large eggs
- 1 cup milk
- 2 tsp vanilla extract
- 4 cups powdered sugar
- 1 cup unsalted butter, softened
- ¼ cup heavy cream
- Red food coloring
- Black food coloring
Instructions
- Preheat your oven to 350°F (175°C). Grease two round cake pans with butter or nonstick spray.
- In a bowl, whisk together all-purpose flour, granulated sugar, baking powder, and salt until well mixed.
- In a large mixing bowl, cream together unsalted butter and granulated sugar with an electric mixer on medium speed until light and fluffy (approximately three minutes).
- Add eggs one at a time while continuing to mix. Stir in vanilla extract.
- Gradually add the dry mixture to the wet mixture, alternating with milk. Mix until just combined.
- Pour batter evenly into prepared pans and bake for 25-30 minutes or until a toothpick inserted comes out clean. Allow cakes to cool completely before frosting.
- In a mixing bowl, beat together softened unsalted butter and powdered sugar until smooth.
- Add heavy cream and continue mixing until light and fluffy.
- Divide frosting into portions; color one portion red and another black using food coloring as desired for decoration.
Nutrition
- Serving Size: 1 slice (100g)
- Calories: 400
- Sugar: 40g
- Sodium: 200mg
- Fat: 20g
- Saturated Fat: 10g
- Unsaturated Fat: 8g
- Trans Fat: 0g
- Carbohydrates: 50g
- Fiber: 0g
- Protein: 4g
- Cholesterol: 80mg
Keywords: Customize your cake by adding festive sprinkles or swapping flavors with chocolate or red velvet. Ensure all ingredients are at room temperature for optimal mixing results.


Leave a Comment